Installation
Quick start
The fastest way to get Moove running (requires Python 3.10 – 3.12 and uv):
git clone https://github.com/veitlab/moove.git
cd moove
uv sync
uv run moovegui        # GUI for datasets & training
uv run moovetaf        # real-time recording & targeting
If you do not have uv yet:
# macOS / Linux
curl -LsSf https://astral.sh/uv/install.sh | sh

# Windows (PowerShell)
powershell -ExecutionPolicy ByPass -c "irm https://astral.sh/uv/install.ps1 | iex"
Requirements
Python 3.10 – 3.12 (3.11 recommended)
PortAudio – required by
sounddevicefor audio I/O (see Platform-specific notes below)A working audio input/output device for real-time experiments
Installing with pip
Moove can also be installed from PyPI:
pip install moove
or for a specific version:
pip install moove==1.1.0
After installation the entry points moovegui and moovetaf are
available on your PATH. A default configuration file
(moove_config.ini) will be created at ~/.moove/ on first start.
Installing from source with uv (recommended for development)
git clone https://github.com/veitlab/moove.git
cd moove
uv sync          # creates .venv and installs all deps
uv run moovegui  # run the GUI
uv sync resolves all dependencies (including PyQt6, PyTorch, etc.)
into an isolated virtual environment. This is the recommended method for
development because it is fully reproducible via the checked-in
uv.lock file.
Platform-specific notes
Windows
PortAudio is bundled with the sounddevice pip package on Windows, so
no extra system-level installation is needed.
pip install moove
moovegui
Note
Anaconda/conda users: When installing via uv, use Python from
python.org (3.10 – 3.12), not
the Anaconda interpreter. Anaconda’s DLL search path can conflict with
PyQt6 and cause ImportError: DLL load failed. If you use Anaconda,
install Moove via conda instead (see conda installation — coming soon).
PyTorch DLL errors on Windows: Some Windows systems are missing the
Intel OpenMP runtime (libomp140.x86_64.dll) that PyTorch’s CUDA
wheels depend on. This causes WinError 1114 or WinError 126
when importing torch. Two workarounds:
If you do not need GPU acceleration (works for most Moove use cases), install the CPU-only PyTorch wheel:
pip install torch --index-url https://download.pytorch.org/whl/cpu
pip install moove
If you need CUDA, install the missing OpenMP library and reboot:
pip install intel-openmp
If that does not help, manually place
libomp140.x86_64.dllintoC:\Windows\System32(see pytorch/pytorch#131662).
If you need low-latency ASIO support, see Enabling ASIO support (Windows) below.
macOS
PortAudio must be installed via Homebrew before installing Moove:
brew install portaudio
pip install moove
moovegui
If you use uv you only need PortAudio on the system; uv sync
handles everything else.
Linux (Debian / Ubuntu)
Install the PortAudio development library and system dependencies:
sudo apt update
sudo apt install python3-dev gcc portaudio19-dev
Then install Moove in a virtual environment:
python3 -m venv .venv
source .venv/bin/activate
pip install moove
moovegui
Or with uv:
uv sync
uv run moovegui
Note
Previous versions of Moove required python3-tk (Tkinter). Since
Moove now uses PyQt6 for its GUI this dependency is no longer needed.
Enabling ASIO support (Windows)
Moove’s real-time targeting depends on low audio latency. On Windows the ASIO audio driver provides the lowest latency and is strongly recommended for real-time experiments.
Modern method (sounddevice ≥ 0.5)
Recent versions of sounddevice ship two PortAudio DLLs – one
with and one without ASIO support. You can activate ASIO by setting an
environment variable before starting Moove:
# PowerShell -- temporary (current session only)
$env:SD_ENABLE_ASIO = "1"
moovegui

# or permanently via System Environment Variables
This is the easiest method and does not require manual file replacement.
Legacy method (manual DLL replacement)
If your sounddevice version does not include the ASIO DLL, you can
replace the PortAudio binary manually:
Locate the PortAudio DLL in your
sounddeviceinstallation. Common paths:C:\Users\<User>\AppData\Roaming\Python\<Version>\site-packages\_sounddevice_data\portaudio-binaries\ C:\Users\<User>\AppData\Local\Programs\Python\<Version>\Lib\site-packages\_sounddevice_data\portaudio-binaries\
You should see
libportaudio64bit.dlland possiblylibportaudio64bit-ASIO.dll.If both files exist: delete
libportaudio64bit.dlland renamelibportaudio64bit-ASIO.dlltolibportaudio64bit.dll.If only the non-ASIO DLL exists: download the ASIO-enabled binary from https://github.com/spatialaudio/portaudio-binaries and replace the existing file.
Install the Steinberg ASIO driver for your audio interface, restart your PC, and verify that ASIO devices appear when starting MooveTaf.
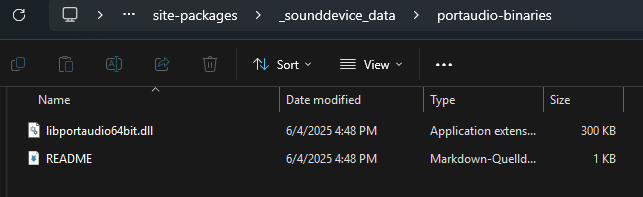
Figure 1 The portaudio-binaries folder with both DLL variants.
Custom PortAudio path
You can also point sounddevice to a custom PortAudio build via the
SD_PORTAUDIO environment variable:
$env:SD_PORTAUDIO = "C:\path\to\my\libportaudio64bit.dll"
moovegui
This is useful if you compile PortAudio with ASIO support yourself.
Installing with conda
Note
The conda-forge package is prepared but not yet uploaded. The instructions below will work once the feedstock has been accepted.
Moove can be installed from conda-forge:
conda install -c conda-forge moove
or, if you use mamba (recommended for faster dependency resolution):
mamba install -c conda-forge moove
This will automatically pull in all required dependencies including PortAudio, PyTorch, matplotlib, and the helper packages (evfuncs, rangeslider, etc.).
After installation the entry points moovegui and moovetaf are
available on your PATH:
moovegui        # GUI for datasets & training
moovetaf        # real-time recording & targeting
Note
The conda-forge PortAudio package does not include ASIO support
due to the proprietary Steinberg ASIO SDK license. For Windows
real-time experiments that require ASIO, use the pip installation
instead (pip install sounddevice bundles ASIO-enabled binaries).
Where is Moove installed?
After pip install moove, the package lives in your Python
site-packages directory. On Windows a typical path is:
C:\Users\<User>\AppData\Local\Programs\Python\Python312\Lib\site-packages\moove\
The entry-point scripts (moovegui.exe, moovetaf.exe) are in the
corresponding Scripts folder:
C:\Users\<User>\AppData\Local\Programs\Python\Python312\Scripts\
You usually do not need to access these folders directly.
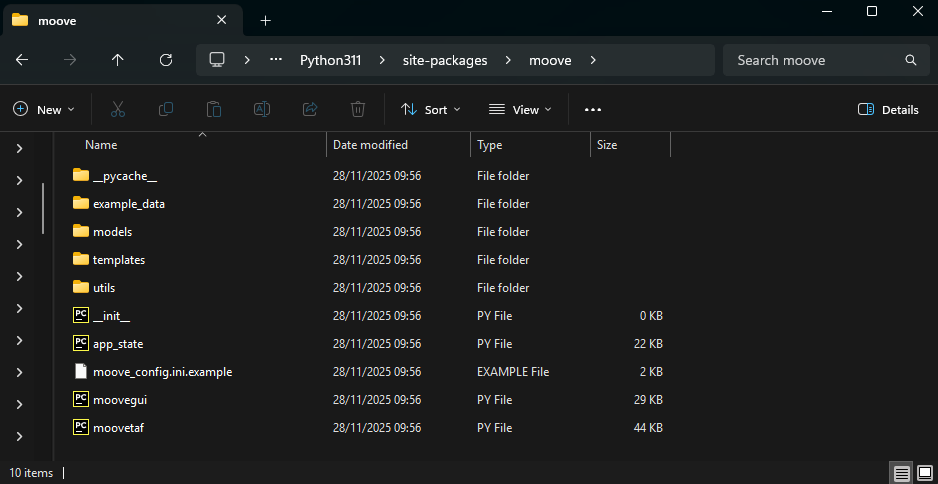
Figure 2 Figure: Moove folder in site-packages.
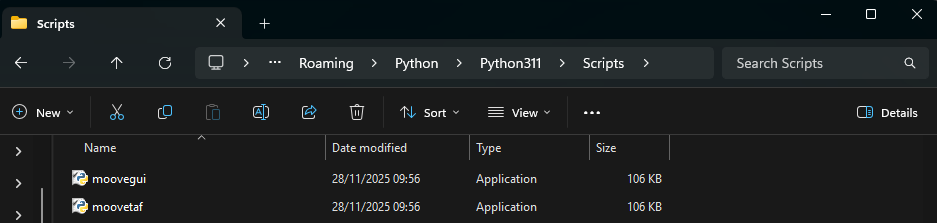
Figure 3 Moove entry points in the Scripts folder.
(Optional) Hardware we are currently using
In our lab, we use the Yamaha Steinberg IXO12 / IXO22 audio interface for recordings. Feel free to use any other setup that you may or may not already have. The only thing we do recommend is using the ASIO audio driver when working on Windows, as it can provide very low latencies. If you are using a different setup, you can ignore this section.
This manual for the interfaces can be found at the Steinberg website directly: https://www.steinberg.net/audio-interfaces/ixo12/
Download the driver from the Steinberg website (available for macOS and Windows):
https://o.steinberg.net/de/support/downloads_hardware/yamaha_steinberg_usb_driver.html
Restart your computer after installation and adjust the driver options to your setup. Latency should be as low as possible, but make sure that the options are suited for your setup, i.e. decreasing latency will need more computing power.
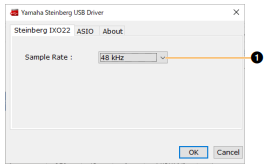
Sample rate (44.1 – 192 kHz)
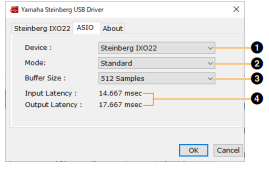
Device selection (if more than one connected)
Latency mode
Low latency (requires high CPU performance)
Standard latency
Stable latency (highest latency; for devices with lower CPU performance)
Buffer size (depends on sampling frequency)
Input / Output latency (depends on buffer size; lower = faster)